
Character passive route guide for PoE2 0.5
PoE2 Passive Skill Tree Guide: Nodes, Routes, and Patch Checks
The PoE2 passive skill tree is easier to use when you treat it as a route with constraints, not as a picture to copy. Start from the class position, identify the rule or stat you need, count every travel node, and check the current tooltip before committing points. This guide explains the node types, a repeatable route audit, and the boundaries between character passives, Atlas passives, Ascendancy points, and weapon-set points.
Reviewed on 24 October 2026 with the repository's 0.5 tree data, Similarweb keyword tabs, official Path of Exile sources, and the live-client caveat that patch text can change.

Quick answer
Quick answer: read the PoE2 passive skill tree as a route budget
Choose the class start first, then write the one effect the route must provide. Mark the keystone, notable, socket, or defensive cluster that answers that need, and count the small nodes required to reach it. A good PoE2 passive skill tree route still works when you account for attributes, equipment requirements, recovery, respec cost, and the next ten points. Use the homepage planner to search and allocate the path, then use this guide to check the assumptions around it. The planner is a route tool; the current game client decides the live tooltip and whether the character can use the result.
What the PoE2 passive skill tree contains
The character tree is a connected map of small passives, notables, keystones, sockets, class starts, and Ascendancy areas. Small passives usually pay for travel or add a modest stat. Notables concentrate a theme such as damage, defence, recovery, attributes, projectiles, minions, or ailments. Keystones rewrite a rule and can change how resources, damage, equipment, or recovery work. A jewel socket is an item decision: the point buys a place to evaluate a jewel rather than a fixed stat line.
The visible shape can be misleading. Two clusters may look close but require different attributes, a long connector, or a socket that only pays off with the right item. Start with the effect you need and work backward to the shortest legal route. Keep a note of the class start, the target node, the number of travel points, and the first point at which the route becomes useful. That makes a partial route easier to test than a screenshot of a finished tree.
Keep character passives separate from the other planning layers. Atlas passives change maps and endgame mechanics. Ascendancy points use a specialization tree. Weapon-set points can change how a weapon swap allocates passives. Skill-point quests add to the character budget but do not turn Atlas points into character points. The homepage planner can display several of these choices, while each focused guide explains its own source and limits.
| Node or layer | What it changes | What to verify |
|---|---|---|
| Small passive | A focused stat or travel connection | The next cluster and attribute requirements |
| Notable | A concentrated build theme | Whether the effect supports the whole route |
| Keystone | A rule change with a trade-off | Gear, resource, defence, and recovery consequences |
| Jewel socket | An item slot and its opportunity cost | The jewel, socket distance, and alternatives |
| Ascendancy / Atlas | Separate specialization or endgame systems | Its own point source and UI |
Node types: small passives, notables, keystones, and sockets
Use node type to decide how much evidence you need. A small passive can be accepted when it is a cheap connector that also supplies an attribute or a useful stat. A notable deserves a comparison against the next available notable, because its visible effect may be weaker than the points needed to travel there. A keystone needs a build-level test: read the new rule, list what it breaks, and check that gear and skills can pay the cost. A socket needs an item plan before it earns a point.
The same node can have different value at different stages. An attribute node may be essential while levelling and disposable after gear upgrades. A recovery notable can be more valuable on a new character than on a fully equipped mapping setup. This is why a static best-tree list is fragile. Use the current node text as a fact, and treat route value as a hypothesis that should survive a small test.
The visual below is an editorial explanation, not an official screenshot. It separates node categories so the article remains readable even when a patch moves the actual tree. The HTML table carries the factual boundary; the generated image is only a visual cue.
How to read a route from the class start
First select the class that the character will actually use. The start determines travel cost and can make a nearby cluster cheap or expensive. Then mark the route's first useful checkpoint: a defensive threshold, a required attribute, a keystone rule, or a notable that makes the skill functional. Do not count only the final highlighted nodes. Count every connector, socket detour, and attribute correction between the start and the checkpoint.
Next compare a short route with the finished route. If ten points make the skill work, record that version before planning the next twenty. A partial route gives you a real baseline for damage, defences, recovery, and equipment requirements. It also shows which points are optional when a patch changes a cluster. The planner is useful here because search, class selection, diff view, and export keep the route reproducible.
When a route crosses an Ascendancy wheel or a weapon-set allocation, label that boundary in the notes. A character can have enough ordinary passive points and still lack the separate points needed for the other layer. Treat a route export as a draft until the live client confirms node wording, class conditions, and the current point budget.
- 1Write one sentence describing the route's job: damage, defence, attribute, recovery, or a rule change.
- 2Select the class start and mark the first node that proves the route is useful.
- 3Count every travel node, socket detour, attribute correction, and point from a separate layer.
- 4Test the shortest working version before adding a second cluster or a keystone.
- 5Export the route with the patch, assumptions, and a note about what would make you respec.
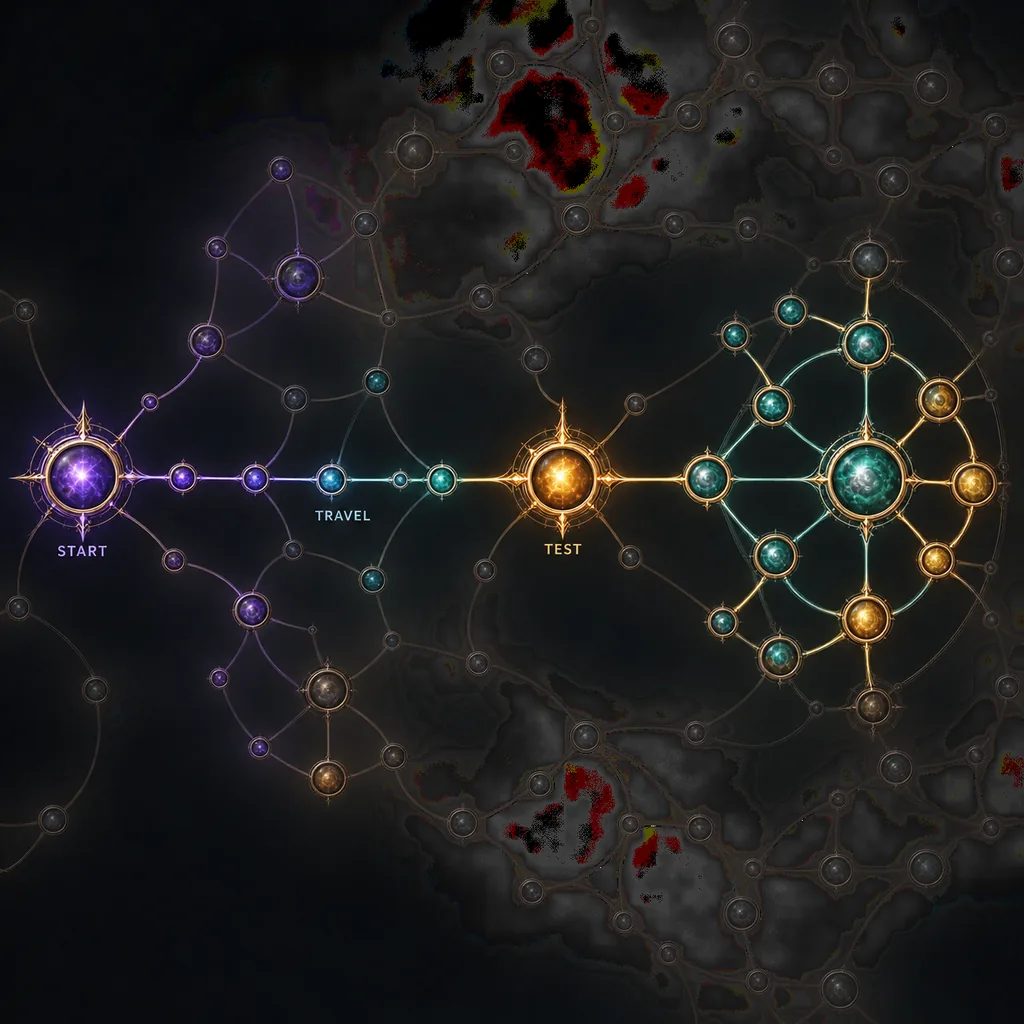
Travel cost, attributes, sockets, and weapon-set boundaries
A route's cost is larger than the number printed beside a cluster. Travel points have an opportunity cost: they may delay life, energy shield, resistances, damage, or the next required attribute. Add the cost of a socket and the item that fills it. If the route needs a strength or dexterity node only to equip a temporary item, note when that node can leave. This turns a pretty path into a schedule you can revise.
Weapon-set points deserve a separate line in the audit. They can make a swap route look efficient because the same tree image hides which points belong to which set. Ascendancy points and Atlas points are separate again. The boundary table is a reminder to confirm the correct UI and point source before changing a character route.
Use the following comparison when a proposed route feels short but the build still fails. The action is to identify the layer, verify its point source, and only then move points. If the correct answer is a respec, link to the reset guide rather than treating the planner as a refund button.
| Planning layer | Point source | Typical audit question |
|---|---|---|
| Character passive | Level and skill-point rewards | Does the route fit the class start and next ten points? |
| Ascendancy | Ascendancy trials and its own budget | Is this wheel unlocked and does its rule support the build? |
| Atlas passive | Endgame Atlas objectives | Is this a map mechanic decision rather than a character stat? |
| Weapon set | Weapon-set allocation | Which swap uses the point and what changes between sets? |
Patch checks before you trust an old tree
Patch changes can add, remove, move, rename, or rewrite nodes. A route that still has the same silhouette may no longer have the same effect. Load the current tree, compare an older route with the 0.4 versus 0.5 view when relevant, and search every defining node by its current name. If the node is missing or its stat line changed, stop at the first difference and choose a replacement before spending points.
Separate documented facts from your test result. Official patch notes or the live tooltip support a statement about a change. Your map or boss sample supports a statement about how the route felt. Do not turn one successful run into a permanent tier list. Record the patch date in the export so a later review can tell whether the assumption is still current.
Common passive-tree mistakes and when to revise
The first mistake is copying a finished screenshot without its class, gear, level, or point budget. The second is spending every point before testing the first useful checkpoint. The third is mixing Atlas, Ascendancy, weapon-set, and character points in one total. The fourth is trusting a node name after a patch without reading the current tooltip. Each mistake hides the reason a route works or fails.
Revise the route after a measurable trigger: a required item no longer equips, repeated deaths expose a defensive gap, a keystone rule breaks the skill rotation, a socket has no affordable jewel, or a patch changes a defining node. Keep the old export and write the reason for the change. That history is more useful than a new screenshot with no assumptions.
The phrase best PoE2 passive tree is therefore a question about conditions. The best route for a league start may not be the best route after gear upgrades. A safe recommendation is to state the build condition, the patch, the first working checkpoint, and the trade-off that makes the route worth its travel cost.
When to respec
| Trigger | Action | Why |
|---|---|---|
| A patch changes a defining node | Re-read and retest | The old tooltip is no longer evidence |
| The route misses a required attribute | Compare a nearby cluster or temporary stat node | Equipment and travel cost are linked |
| Repeated deaths or resource failures | Refund the risky branch | A damage gain is not useful if the loop breaks |
| A socket lacks a fitting jewel | Delay or replace the socket | An empty socket is still a point cost |
The three signals in a route audit
A route is ready when the class start, the travel cost, and the live test agree.
PoE2 passive skill tree FAQ
What is the PoE2 passive skill tree?
It is the connected character tree of small passives, notables, keystones, sockets, class starts, and Ascendancy areas. This guide treats it as a route budget; the live client decides current wording and requirements.
How do I read the PoE2 passive tree from my class start?
Select the class first, identify the first node that makes the route useful, and count every connector, attribute correction, socket detour, and separate point layer between the start and that checkpoint.
What are the main PoE2 passive tree node types?
Small passives provide focused stats or travel, notables concentrate a theme, keystones rewrite a rule with a trade-off, and sockets create an item decision. Each type needs a different test.
Can I use this guide to search the passive tree?
Use the homepage planner for the search and allocation action. This page explains what to do with the result and how to audit the route before spending points.
How many passive points should I spend before testing a route?
Test the shortest version that proves the route's stated job, then add one cluster at a time. The right checkpoint depends on the build, equipment, and current patch rather than a universal number.
How do I reset the PoE2 passive skill tree?
Use the current in-game refund flow and the dedicated reset guide. The planner can document a replacement route, but it does not refund points in the game.
Are Atlas passives the same as character passive points?
No. Atlas passives affect endgame map mechanics and have a separate point source. Ascendancy and weapon-set points are also separate layers that should not be added to the ordinary character total.
Should I copy a PoE2 passive tree screenshot from an old build?
Use it as a hypothesis only. Load the current tree, search each defining node, compare the patch view, and record the class, gear, point budget, and trade-offs before copying any route.
Sources and limits
Similarweb was used for topic selection, not gameplay balance. Official Path of Exile pages and the live client should win when a node name, requirement, or effect conflicts with an older guide. This is an independent fan-made planning resource.
No page-specific official screenshot was available in the repository or the checked public source set. The two WebP assets are labeled unofficial explanatory illustrations; the node boundary diagram below is HTML/CSS and crawlable text.